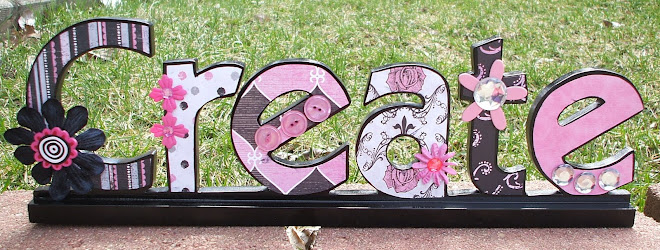

One of my favorite ways to decorate my home for various holidays is to decorate precut wooden signs. The sign I decorated here came in white, but these also come in black. Since they aren’t raw wood, it saves the step of having to paint them. If you find a raw wooden sign though don’t be frightened! A quick paint job and you are ready to decorate.
Wooden Sign
For this project I reached for one of the Halloween Mat Pads by K&Co, they were the perfect size (4.75″ x 6.75″) as I didn’t waste a lot of paper when tracing. The mat pads have two sided papers – one printed, one solid – and all papers coordinate together. On my sign I varied between patterns and solids. Decide which paper you want to use, trace the letter with a pencil and cut out. This sign had some areas I couldn’t trace very well so on those areas I put the paper over the sign and pressed around the edges to find where I should trace. Since I was planning to shabby this up, I wasn’t worried about pencil lines. If you don’t want to erase the lines and aren’t going shabby, flip the sign over and trace on the back side of the paper before cutting out.
 After tracing and cutting out the letters (you may need to do a little trimming), it’s time to crinkle your paper. If you don’t want such a rough looking crinkle you can spray with water first or even iron some of the wrinkles out. You then take your ink pad to the wrinkles and add ink to the edges and wrinkles. I also rubbed my ink pad around the edges of the letters on my sign so everything would blend into the bright white sign better. To adhere I recommend an extra sturdy tape such as Therm O’ Web Super Tape. I then added some of the coordinating Grand Adhesions Halloween Stickers to the sign.
You can often find these word signs on clearance after the holidays or sometimes even before if they are damaged. This sign had a couple chips in the letters and I easily covered them up with paper and some ink. The next time you see a wooden wood sign at a store, get out your scrapbooking supplies and decorate!


